A Brief Introduction to Backups
Keeping your virtualization infrastructure backed up is extremely important. Honestly, I might not need to tell you that, but I probably also don’t need to tell you that some really do need to be told that.
When backing up PCs, cloud backup services are often decent, but can often be costly when backing up large amounts of data. What to do if the provider changes pricing and/or T&C? What if the cloud provider announces they’re going out of business and there is suddenly 30 days to download 10TB of data? What if they give zero notice and that data is simply gone? That’s simply a single point of failure. External HDDs are a one time cost, but can and will fail over time. That’s another potential single point of failure. Both also only backup data at the file level, which is perfectly fine for all of those critical files, but much less so when the need is to back up critical infrastructure. In the event of an OS failure, it may not be trivial to reinstall and reconfigure everything. However, the file-based backups are relatively safe and can be reconnected soon after.
Adding Network Attached Storage (NAS) to the local network is not entirely unlike adding the external HDD to the PC, but with the added potential of redundancy with multiple HDDs aggregated together in an array, such that (depending on RAID level) one or more HDDs can fail before the entire array is lost. Additionally, with a NAS on the network, multiple PCs can use it as a backup target. This is still a file level backup, but the additional redundancy should give a bit more peace of mind.
For anything truly critical, it is worth considering the “3-2-1 Backup Rule”, or as I like to describe it:
Make a backup. Make a backup of that backup. Make a backup of that backup of that backup off-site.
It is also worth not viewing that as a strict rule, but as a very solid start for a backup strategy. It may be absolutely adequate for some folks, and others may require more. I would not recommend less.
IMPORTANT: Considering the potential criticality of anything regarding backups and replication, I highly recommend also supplementing this section with the official documentation to make sure your backups and your environment are as safe as possible.
IMPORTANT: Your backups are only worth anything at all if they can be successfully restored. Test restoring them ensures that the initial backup processes, network, and storage are good. Doing that periodically helps to find any unexpected problems along the way. Without a successful restore, did you even make a backup at all?
Backups and Xen Orchestra
Xen Orchestra includes a very robust backup engine that can easily manage backups within a homelab, as well as complex critical production infrastructure. While XO-CE has all backup elements enabled, XOA requires a support license purchase to enable the elements associated with that tier. For anything critical and/or production, I would highly recommend XOA with a support license purchase since with XO-CE you are entirely on your own. That being said, XO-CE can be a great learning tool for IT professionals to use in a test environment if they need longer than the initial trial.
While the examples above worked at the file-level, Xen Orchestra operates at the block level to backup entire disks of Virtual Machines. This means that if something breaks in a VM, it is fairly trivial to restore the entire VM from a backup. Of course, considerations must be made for resource constraints and bottlenecks in infrastructure, but there is no need to reinstall and reconfigure an OS before accessing critical files. Even quicker are snapshots. They should not be considered backups, but maybe proto-backups (don’t quote me on that). They are as the name suggests, a snapshot of the VM’s disk at that point in time, and they live in the same place as that disk.
Deciding on backup strategies is essential for any critical infrastructure, and it is not a bad idea to treat personal environments with a similar level of attention and respect. This section of the tutorial will show how to set up the basic backup strategy that I have used in my environments. However, I would highly recommend also browsing the official documentation for further clarification, anything I may have missed, and/or anything that may be out-of date here.
Backup Remotes
Before you configure your backup jobs, you must first configure where the backups will be sent. This is done with Backup Remotes and must be a different share/export than an SR.
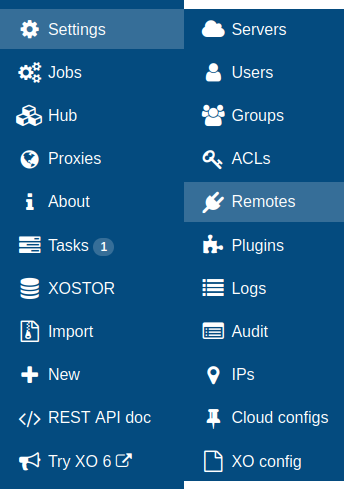
Go to Settings > Remotes.
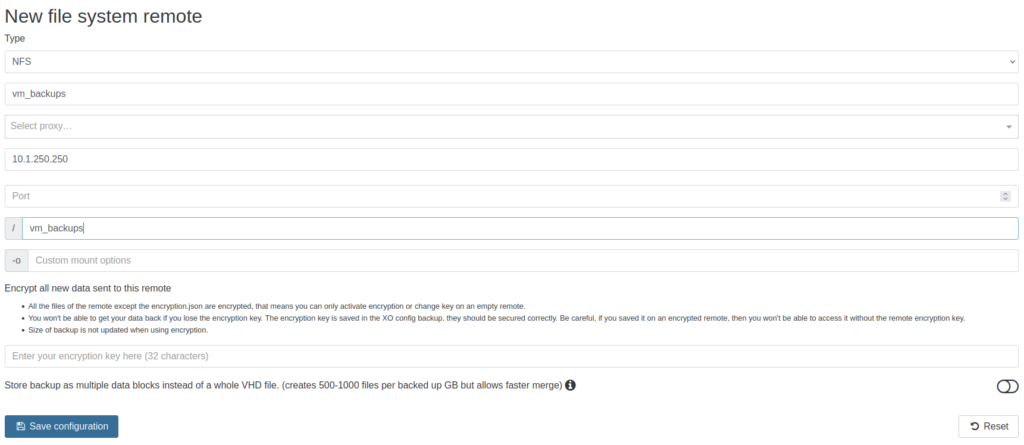
The remote type here will decide how much information needs to be configured. Types can be local (not typically recommended), NFS, and SMB. Additionally, S3 (and compatible) and Azure can be configured. My backup remote uses NFS, so I simply need to add the NAS IP (using the IP on the storage subnet/VLAN) and the export path. Click ‘Save configuration’ to continue.

If XO is able to successfully connect to the remote, a new row should be created. Note how this row is below NFS. Remotes are grouped based on their type, so there could also be SMB and S3 sections.
- Name – Editable name/label. Keep it simple/predictable as it will be displayed when creating backup jobs and when viewing backup reports.
- Device – This is the IP host and path based on the remote type
- Options – Editable field to set additional mount options for NFS and SMB
- Status – Green is connected, toggle to red for disconnected
- Disk (Used / Total) – Basic disk usage from the remote host. This is an existing backup remote and is not empty.
- Encryption – Indicates if encryption was enabled during the creation of the remote in the previous step. Read the documentation for more information.
- Speed (Write / Read) – A brief speed test is run on the remote at creation, and can be run again later at any time.
- Proxy – If this remote is behind, and backups are relayed through, an XO-Proxy this can be configured here.
The final three buttons are to test the remote and re-run speed test, edit remote (which repopulates the fields below), and delete.
Configuring Backup Jobs
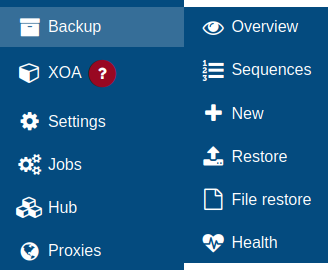
The first stop when examining backups typically might be the Overview page (clicking ‘Backup’ also goes here), but it is not very interesting right now without any backup jobs configured. Instead, go to Backup > New.
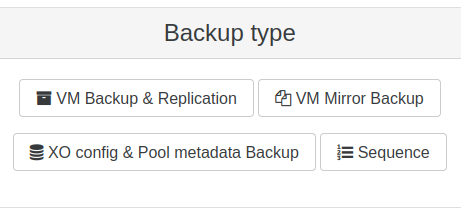
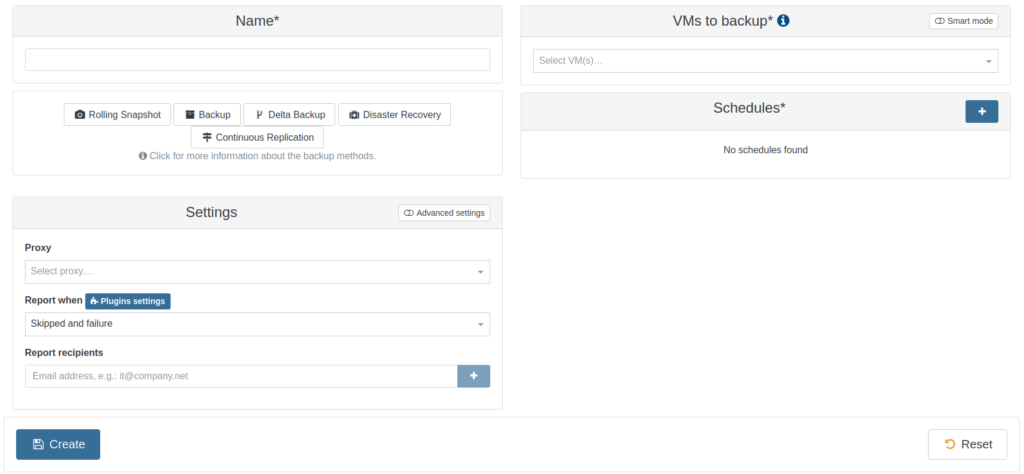
Each of the four options here deserves its own section, but for this tutorial we will be focusing on ‘VM Backup & Replication’ and ‘XO config & Pool metadata Backup’, with a brief description of the remaining two. First off, start by clicking ‘XO config & Pool metadata Backup’.
XO Config & Pool Metadata Backup
This is arguably the most important initial backup job that anyone should configure when deploying Xen Orchestra. The XO Config contains users and groups, backup jobs, plugin configuration, and more. It exists only within this one XO, or the backups. The pool metadata consists of the metadata for all of the VMs, SRs, networks, hosts, and more across the pool, and is replicated across the pool.
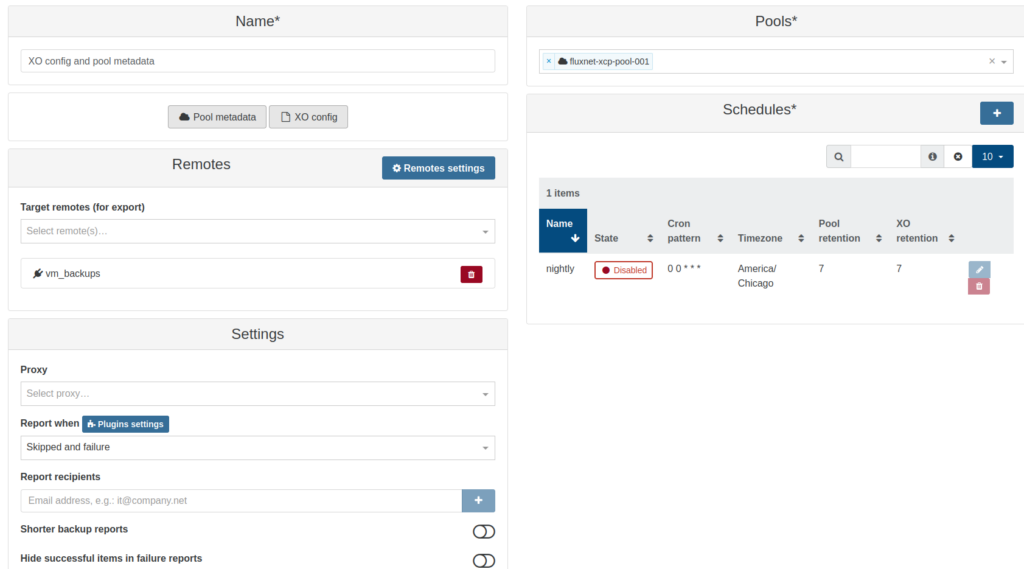
This backup job can be for either the pool metadata, the XO config, or both. After deciding which this backup job is for, create a name for the job directly above. Since this job is displayed in lists in several places, I would recommend a simple name that reflects the type of job, the run frequency, as well as the retention to make it easier to find.
- Remotes – Open the ‘Target remotes’ drop-down menu and select the remote configured earlier. Click the red 🗑 to remove the remote from the job.
- ‘Remotes settings’ button will open that same page from earlier in a new tab.
- Pools – Open the drop-down menu and select all appropriate pools for the job.
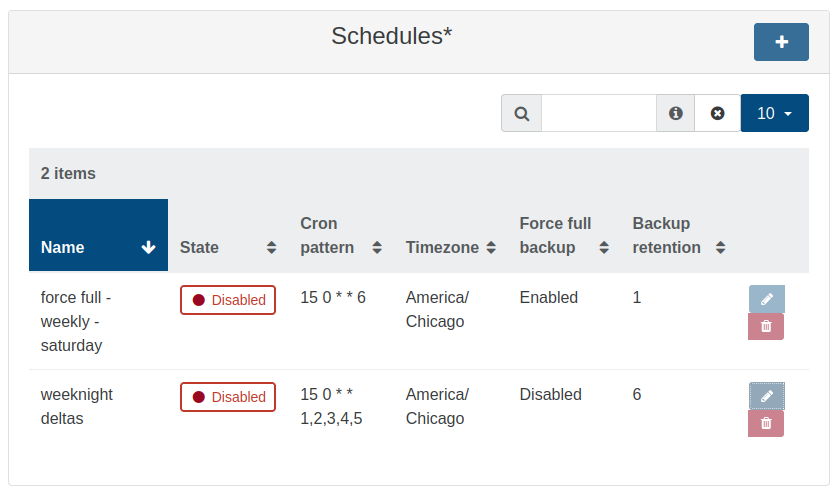
- Schedules – More than one schedule can be created within each backup job. More on this just below, but the screenshot above if what you would see after a schedule is configured.
- Settings –
- Proxy – XO-Proxy to use with this job, if any.
- Report when – Drop-down options include ‘Always’, ‘Skipped and failure’, and ‘Failure’ to set when backup reports will be sent via email.
- The ‘Plugin settings’ button will open that page in a new tab, and SMTP configuration can be set with the ‘transport-email’ plugin. More information on this when I talk about plugins.
- Report recipients – This is a comma-separated list of email addresses to receive the report from this backup job.
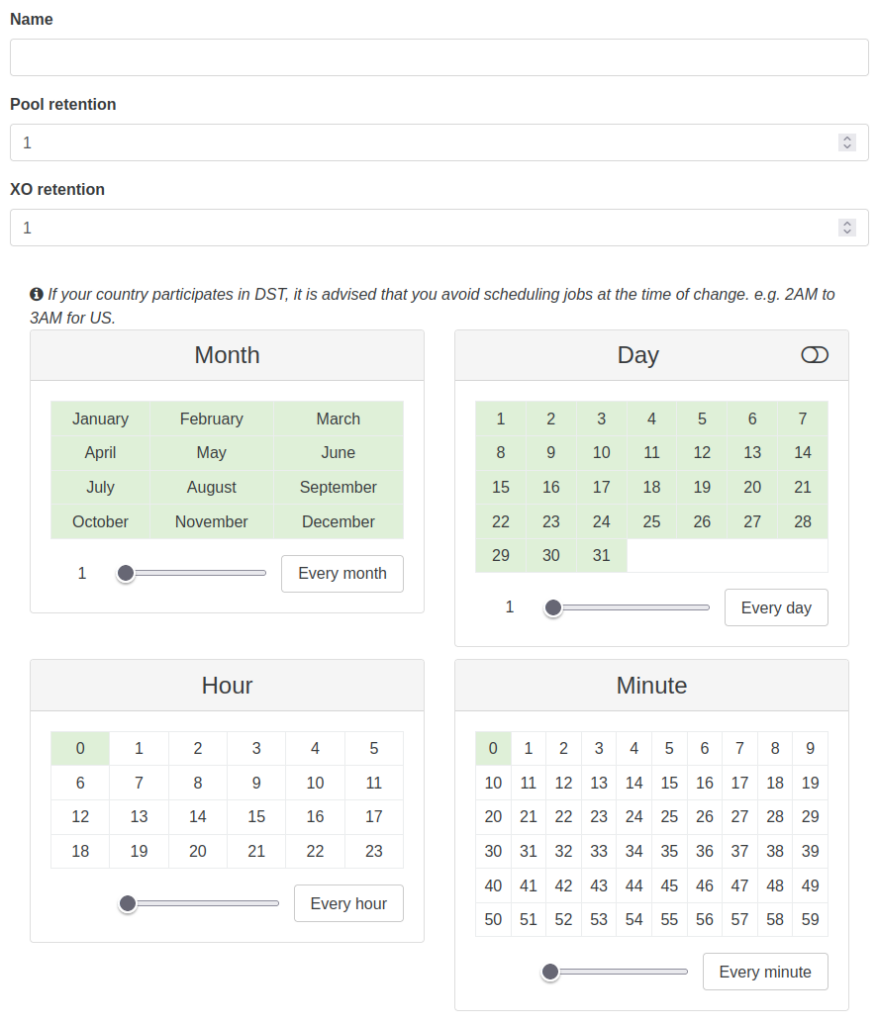
Click the + next to ‘Schedules’.
- Create a name for the schedule.
- Clicking the items inside Month, Day, Hour, and Minute will select or deselect them.
- Days can be chosen by day of the week by clicking the toggle to the right of ‘Day’.
- When selecting an item, make sure to also deselect any unwanted items.
- The slider at the bottom of each section will allow you to easily select every one, two, three, etc. item. The button to the right resets to every one item.
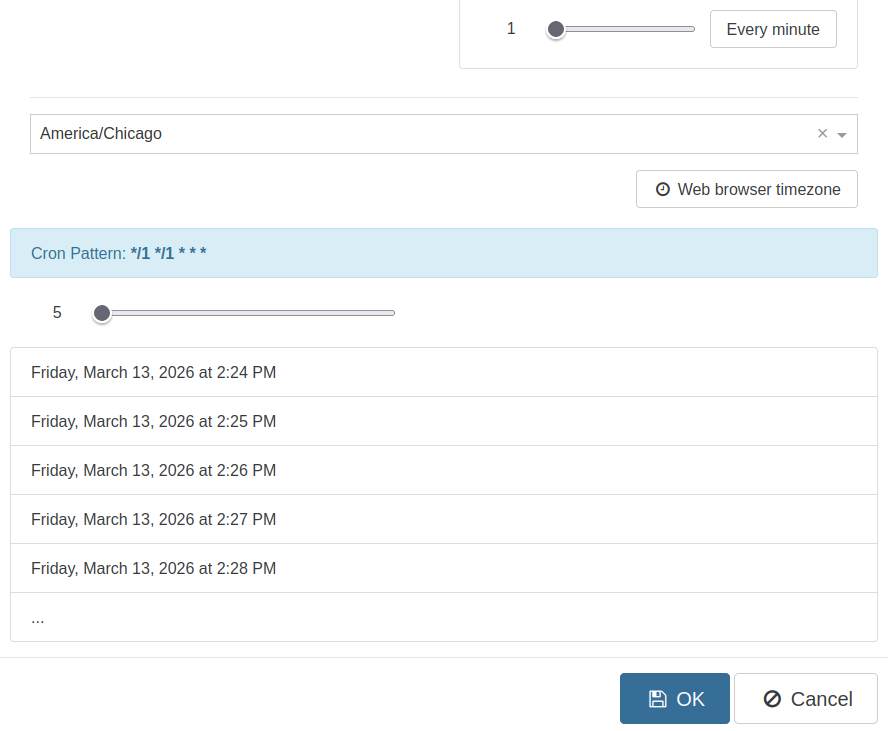
Scrolling just a bit further down, the timezone can be set if this schedule requires something different than local.
Below that, you can see the cron pattern for the schedule. Unfortunately, editing the cron pattern directly is not currently possible. However, the next 5 (or up to 20 if the slider is moved to the right) runs of the schedule are shown below to make an easy visual verification of the settings.
Quick note: The list of runs here was useful for me when creating jobs that would run at 00:15 every night, instead of the default 00:00. Under minute, I toggled 15 on, but forgot to toggle 0 off. That list was a handy visual check showing that the job would essentially run twice nightly. Of course, the job itself was not saved yet, nor enabled, but it does help.
Click ‘OK’ to save the schedule, and the job should resemble the screenshot above. The columns in the schedule section reflect what just in the schedule configuration, so no need to describe them again.
Click ‘Save’ on the job configuration.
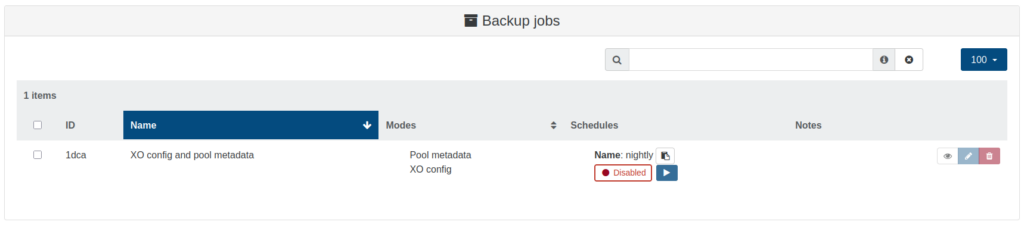
The first job in the list, and hopefully the first of many! The columns here show the unique job ID, name, modes, schedules (jobs can contain multiple schedules). Schedules can be enabled/disabled individually, and be run immediately by pressing the blue ▶️ next to it.
The final three buttons for the job are to view all VMs associated with the job (not relevant for this job type), edit the job configuration, and delete the job.
VM Backup & Replication
That first backup job was the most critical for the core hypervisor infrastructure, but here is where we get into the actual meat and potatoes.
Like before, click Backup > New, but this time click ‘VM Backup & Replication’. At first glance, a lot is similar to the last job, but there is a lot more new here, as well.
Starting the buttons at the top to select the backup ‘sub-type’:
- Rolling Snapshot – This allows snapshots to be created on a schedule, complete with retention. I will not spend much time on this, but one recommendation I would give is to keep the retention very small to prevent corruptions being introduced to a long snapshot chain. This should be used to quickly roll back, not for backups intended to be kept long-term and/or with large retention.
- Backup – Exports a snapshot of the VM disk to the remote. Can be compressed.
- Delta Backup – Also known as Incremental. Initial run exports a snapshot of VM disk as a full backup or ‘Key’, and start of a chain to a backup remote. Subsequent runs export only the changes as a ‘Delta’, and each new ‘Delta’ is a link in the chain. When the retention amount is met, the oldest ‘Delta’ is merged with the ‘Key’. Unless a full backup interval is set, or a rare corruption is introduced to the chain, you may theoretically never need to do a full backup again. Of course, never needing a full backup only happens in a perfect world.
- Disaster Recovery – Simultaneously exports and imports a copy of a VM from one host and SR to either the same or different host and/or same or different SR. Useful for creating copies of VMs ready to boot, whether that is the same location or another. This is intended for quick recovery, not for backups. Each run of this job will create a new VM and disk, each requiring as much storage as the original.
- Continuous Replication – Similar to Disaster Recovery (DR), except involves a chain similar to ‘Delta Backup’. Initial run will create a VM with a full Key disk, and subsequent runs will create a VM with only the delta portion of the disk. If any of those VMs are started, that Delta is merged with the Key to create a new disk that is no longer part of that chain. Like DR, CR is intended for quick recovery, not for backups.
Now I will show how to set up ‘Backup’ and ‘Delta Backup’ as well as my general methodology. It is certainly open to interpretation and modification and not intended to be anything remotely resembling a universal rule. It is fine to take inspiration, but also know your environment and supplement with the official documentation. Typically, I will start with at least one job of each, making sure the schedules do not overlap. For instance, in this tutorial I show how to create a ‘Backup’ job that runs weekly on Sunday, and a ‘Delta Backup’ job that runs on every other day. You may need more or less.
Backup
This job is for exporting full VM disk(s), compressed or not, to a backup remote.
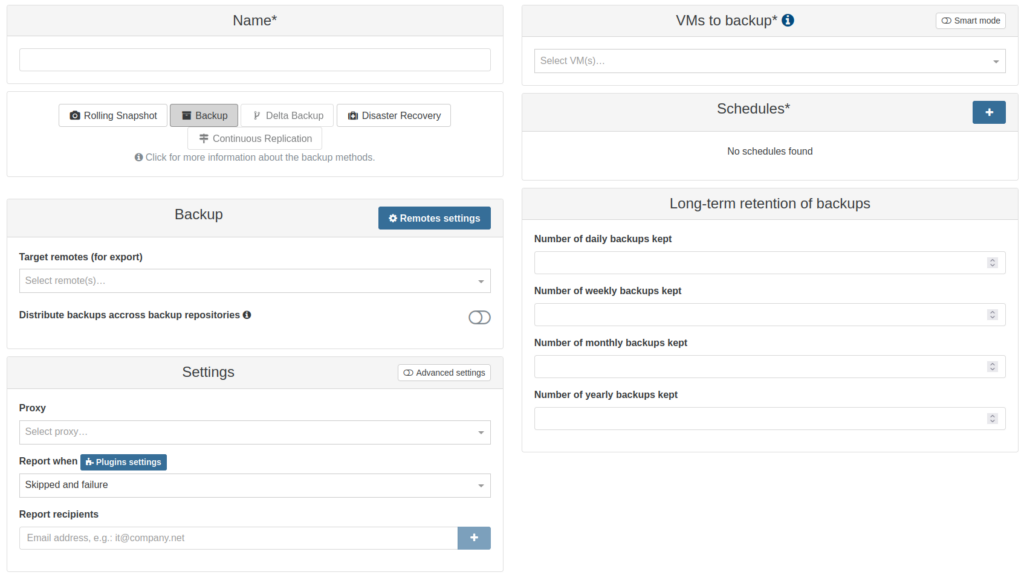
With the new backup page still up, press the ‘Backup’ button to show some new things:
- Distribute backups across backup repositories – (new under Backup) – Instead of each VM backup being sent to each configured target remote, VM backups are distributed among remotes resulting in VM backups being sent to only one target remote per run. Target remotes are selected based on available free space, or chosen at random if none is reported.
- Long-term retention of backups – This is for a GFS retention strategy, but is not used in this tutorial. Please view the official documentation.
Skip the name for now, and focus on the ‘VMs to backup’ section. Each VM can be selected individually in the drop-down menu, but instead click the ‘Smart mode’ toggle.
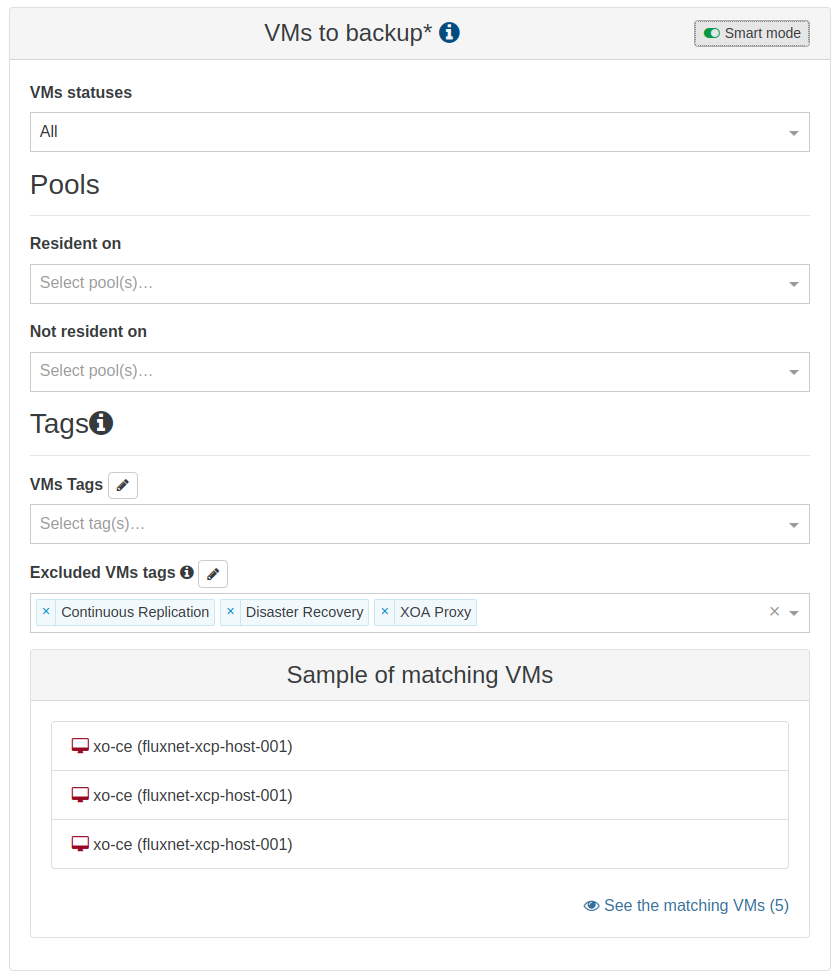
VMs are matched based on a boolean AND of all listed fields:
- VM statuses – Matches all VMs, or only VMs that are running or are halted.
- Choose Running.
- Resident on – Matches VMs only on the selected pools.
- Select the current pool.
- Not resident on – Does not match VMs on the selected pools.
- Leave this blank
- VM tags – Matches VMs with the selected smart tags. Press 🖉 to create a custom tag to be added to VMs later.
- Press 🖉 and enter ‘backup-full’
- Excluded VMs tags – Does not match VMs with the selected smart tags. Press 🖉 to create a custom tag to be added to VMs later.
- No changes necessary.
Below is a sample list of VMs that match the configured criteria Click ‘See the matching VMs’ to see the full list in a new tab. The list should currently be empty because the ‘backup-full’ tag has not been added to any VMs yet.
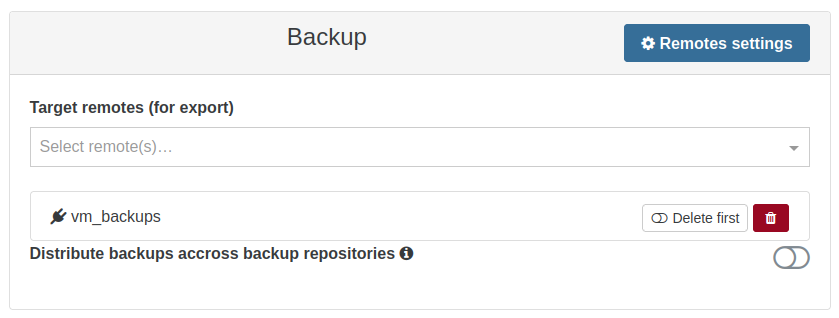
In the ‘Backup’ section, select the appropriate target remote in the drop-down menu and leave ‘Distribute backups’ untoggled.
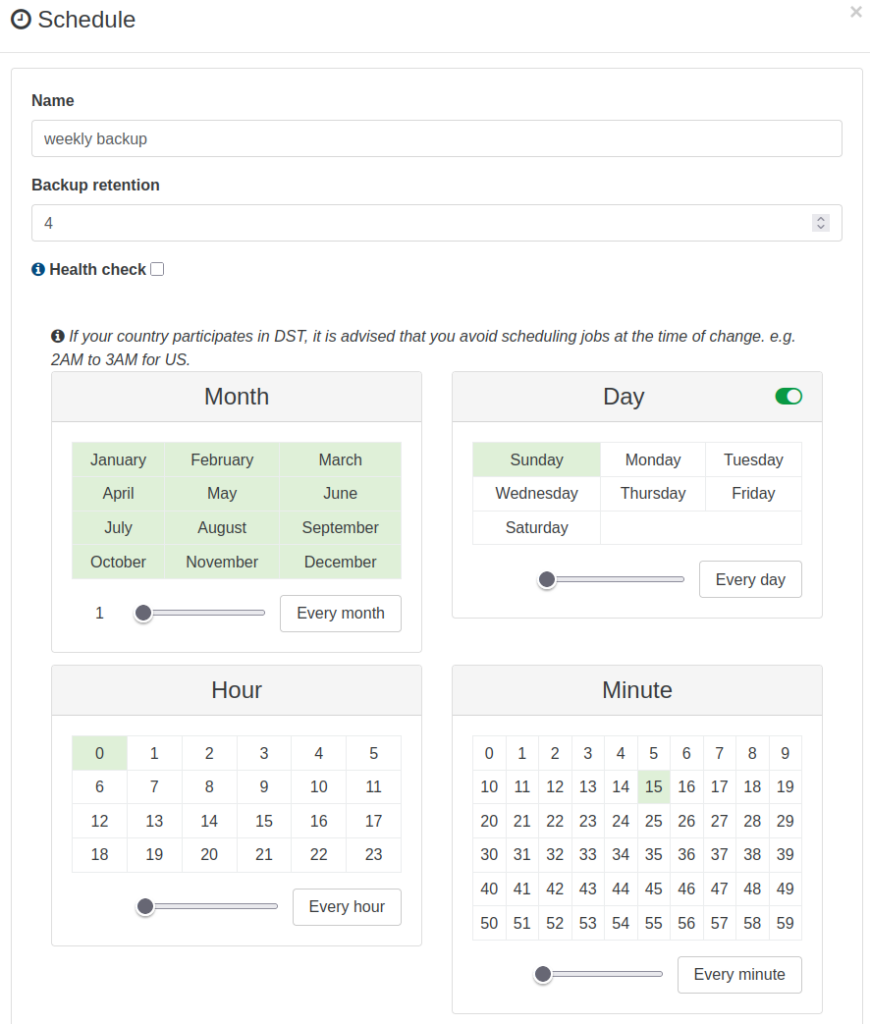
Click the + next to ‘Schedules’. This schedule is set to run weekly on Sundays at 00:15 with a retention of 4. Click ‘OK’ at the bottom.
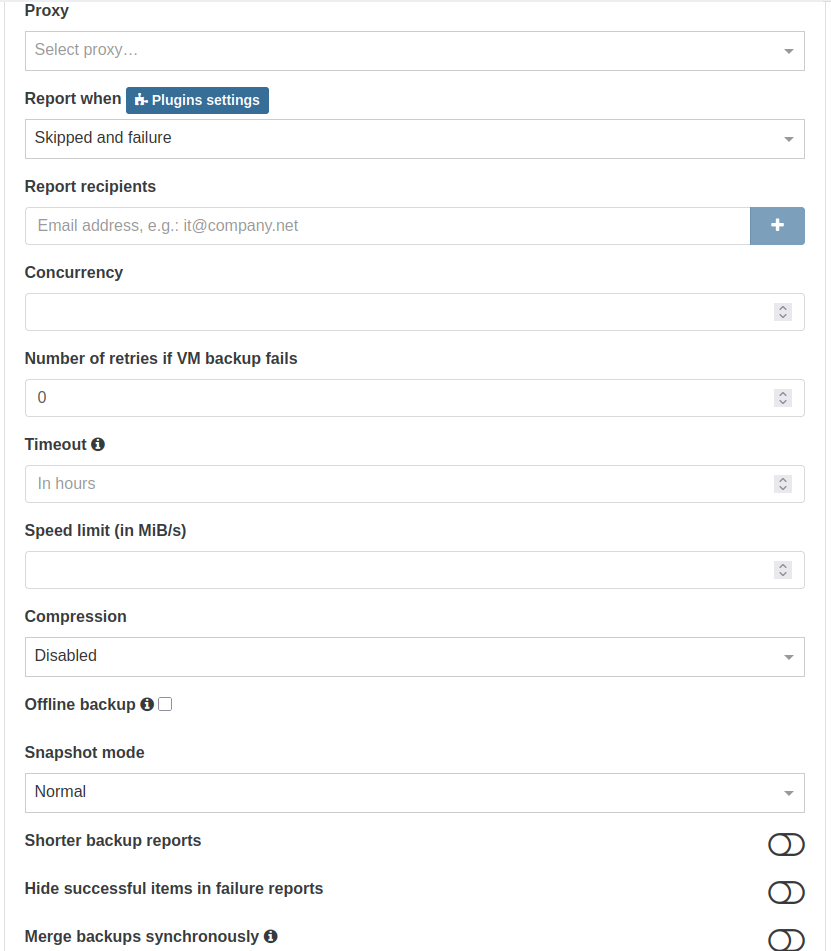
Back to the ‘Settings’ section, click ‘Advanced settings’.
- Proxy – XO-Proxy to use with this job
- Report when – Send email reports always, skipped and failure, or failure.
- Report recipients – Comma-separated list of email addresses to send backup reports.
- Concurrency – Sets how many VMs are backed up in parallel within this job.
- Number of retries if VM backup fails – Defaults to 0.
- Timeout – Job is considered failed if time is reached before completion, whether the job is progressing or not. Defaults to 24-hours.
- Speed limit (in MiB/s) – Allows setting speed restriction for slower or saturated links.
- Compression – Applies compression to backup before sending to remote. GZIP or Zstd.
- Offline backup – Exports backup without snapshot. Requires shutdown of VM. Useful when free space in SR is less than the amount needed to take snapshot.
- Snapshot mode –
- Normal – Take snapshot of VM’s disk, and export snapshot as backup.
- With memory – Like Normal, but the RAM state is included with the backup. VMs may experience a brief pause depending on the amount of allocated RAM and the physical resources below XCP-ng.
- Offline – No snapshot taken.
‘Shorter backup reports’, ‘Hide successful items in failure reports’, and ‘Merge backups synchronously’ are not used here.
The defaults in this section are good for this tutorial. Go back and create a name that reflects the type of backup, included VMs, frequency, retention, etc. Click ‘Create’.
Delta Backup
This job creates a Delta chain, starting with a full or Key backup and smaller subsequent Delta backups containing only the changes since the last time the job was run. Aside from the initial backup, all subsequent backups should be much faster. The goal in this tutorial is to configure a Delta Backup job that runs every night other than Sunday. It will also have a low retention to keep the chain relatively small, and force a full backup weekly to help keep the chain healthy.
Much of this will be the same from the previous section, so let’s jump ahead a bit. Go back to Backup > New, then click ‘VM Backup & Replication’. This time click the ‘Delta Backup’ button and go straight to the + next to ‘Schedules’. Since this backup will run not run on Sunday, it will not overlap with the previous job. However, I do still want to have some control over when the longer Key backup happens, and I do this with two schedules within the same job.
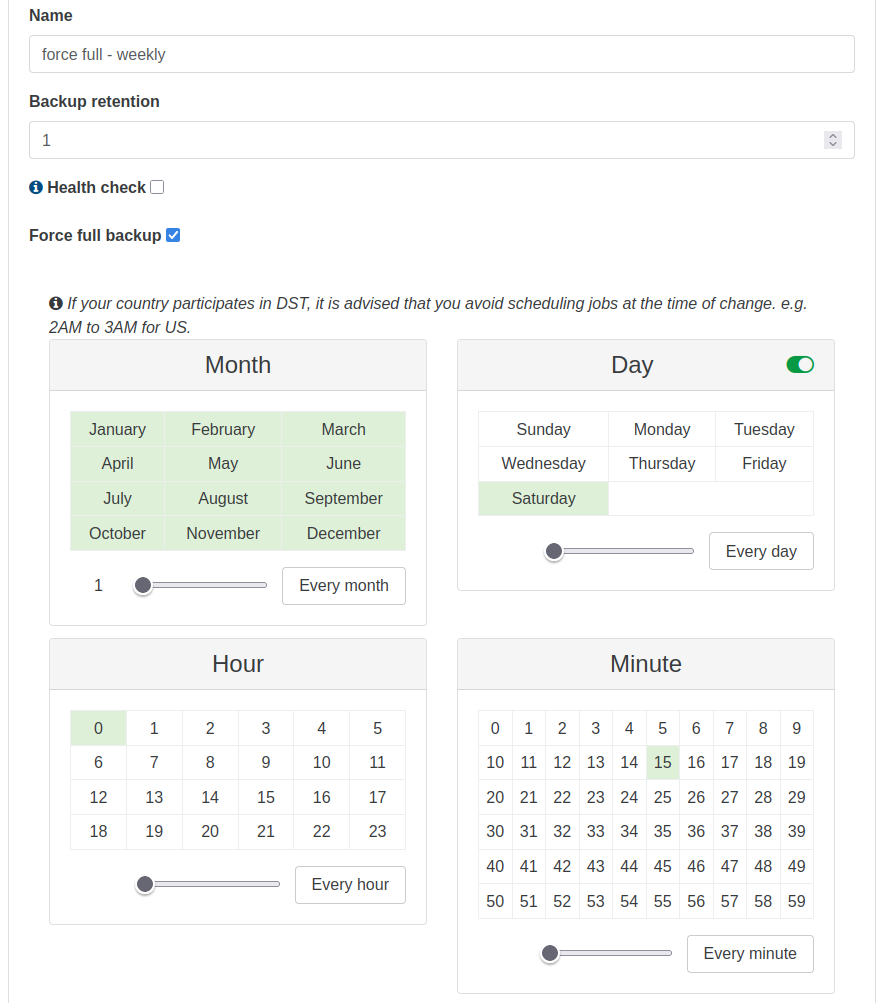
The first schedule will force the full or Key backup every Saturday at 00:15 with a retention of 1 and ‘Force full backup’ enabled.
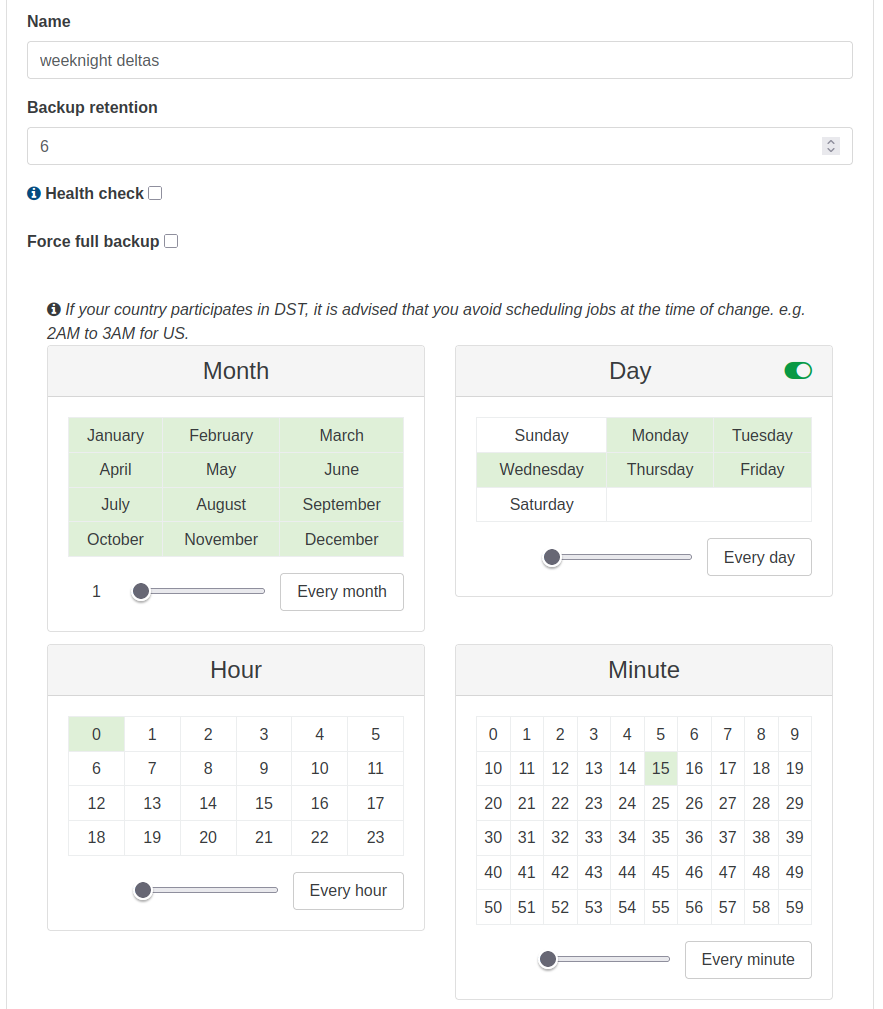
The next schedule will run Monday – Friday at 00:15 with a retention of 6 and ‘Force full backup’ left disabled.
After saving both schedules, that section within the job should resemble this.
Quick Note:Each delta job creates its own delta chain, and retention is cumulative across all schedules inside that job. This means that with two schedules here, one with retention of 1 and the other with retention of 6, that the number of restore points resulting from this job will be 7.
Additionally, while the first run of the job will create the longer full/key backups, and they are also forced weekly, there are few other reasons why a full/key may be triggered instead of a delta. For the full list, see the official documentation.
Everything else here will be left identical to the previous backup job, with the exception of the Name, as well as the ‘VMs tags’ (now ‘backup-delta’). Click ‘Save’.
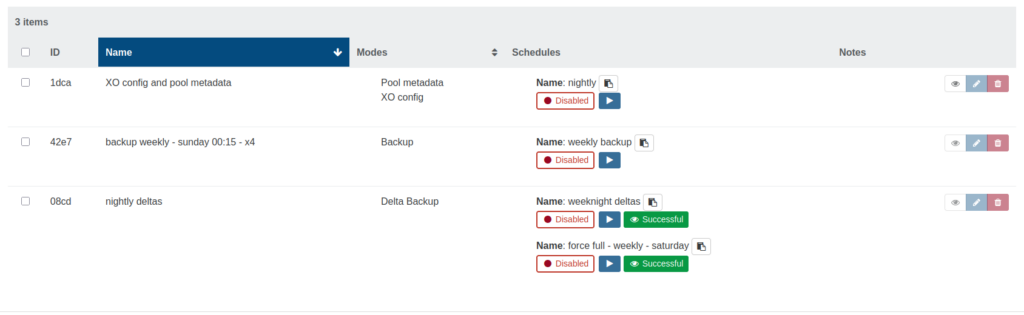
The Backups Overview should now resemble the image above. New jobs will not have the green ‘Successful’ button. (I was testing different schedule configurations while writing this.)
Running a Backup Job
Time to add the smart tags to the XO VM and test these jobs. Click ‘Home’, and then the xo-ce VM.

Tags can be added to the VM by clicking the + near the middle of the page.
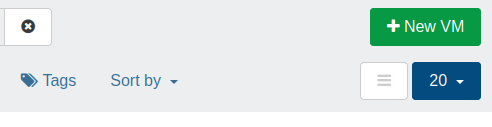
Also, if you go back to ‘Home’ to view all VMs and click the “hamburger” button in the top-right, it expands the detail for each VM.
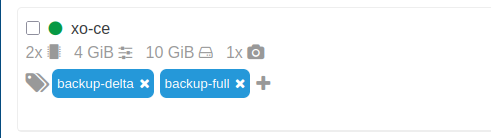
Below the VM’s name is another place where the tags can be added.
Go back to ‘Backup’.
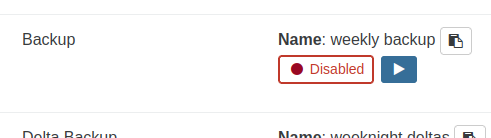
Click the blue ▶️ button next to the weekly backup that would otherwise normally run on Sunday and click ‘OK’ on the dialog box to confirm that you would like to manually start the job.
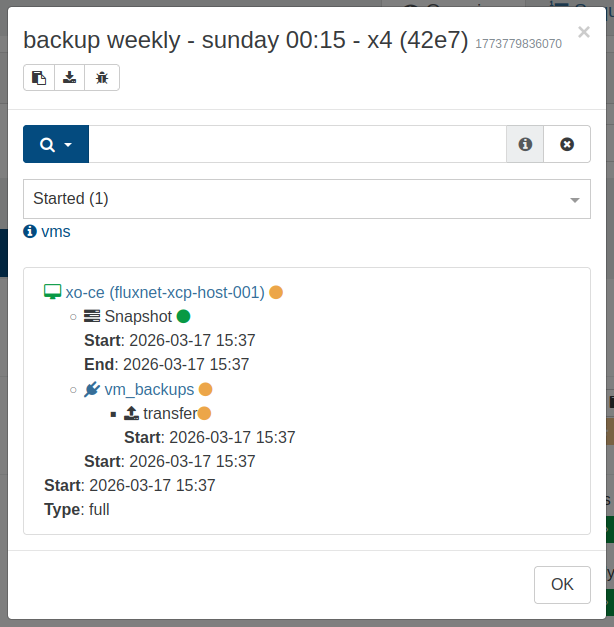
After a few moments, an amber colored ‘Started’ button will appear in the same place as the ‘Successful’ button next to the other schedules in the above image. Click it and this will be displayed showing a real-time status of the backup job. The green dot next to ‘Snapshot’ indicates that step was successful. The amber dots below indicate that a transfer is in progress to the backup remote called ‘vm_backups’. The amber dot above indicates that the entire job is still in progress at some step.
Quick note: Backup type ‘Backup’ will always show “Type: full” here, whereas type ‘Delta Backup’ will show “Type: full” for the key and “Type: delta” for the delta.
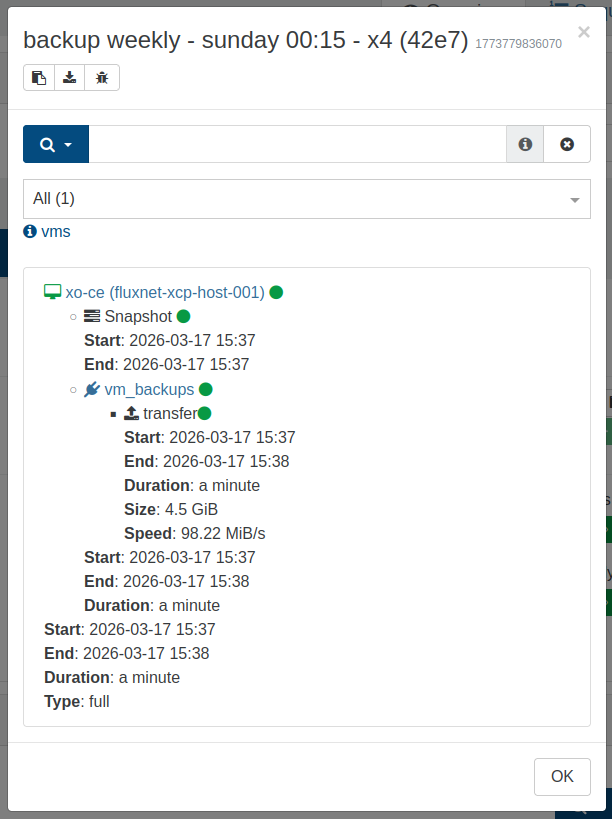
The size of this VM is fairly small, so depending on the network and storage speed, this may be done quickly. If the same window is still up when the job finishes, additional information will show up including the size and speed. Clicking a ‘Successful’ button will show the same information. Click ‘OK’ to close.
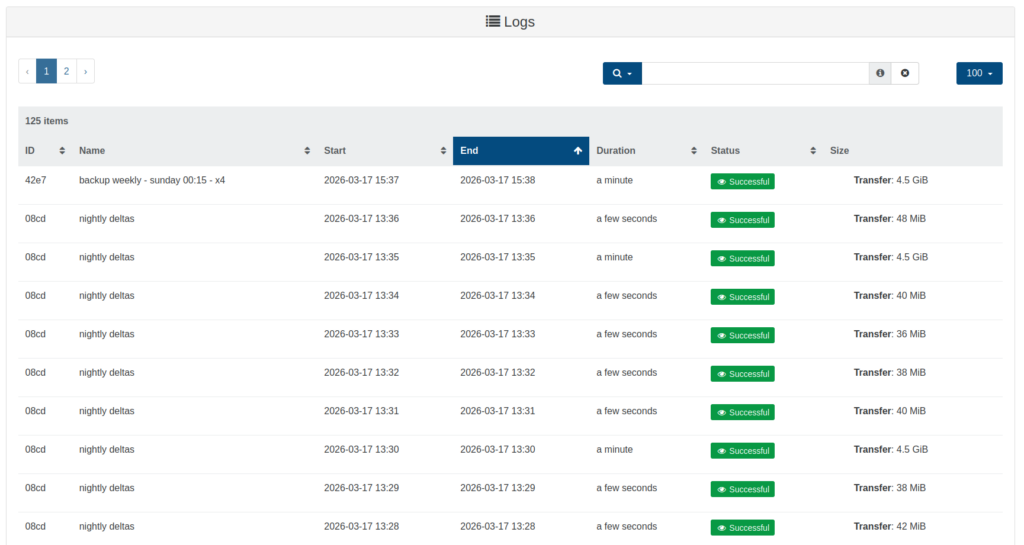
Further down the page, each backup run is logged showing name, start date/time, end date/time, total duration, Successful/Started/Failed, and size. (I was testing for a while.)

Clicking ‘Tasks’ on the left side while a job is running will show a progress bar along with an estimated time of completion for that current step.
Restoring from Backup
As I mentioned at the start, backups are only worth anything if they are able to be restored.
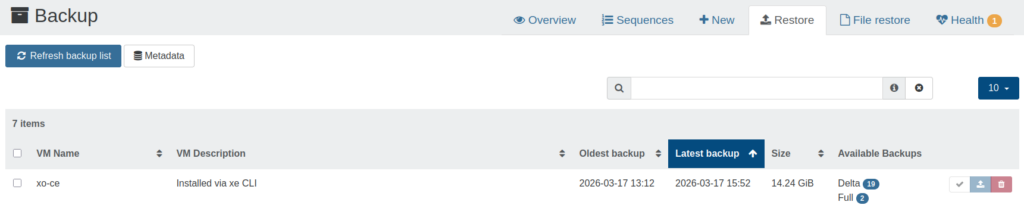
Click ‘Backup’, then click the ‘Restore’ tab at the top.
- VM Name
- VM Description
- Oldest Backup
- Latest Backup
- Size – Total size on disk
- Available Backups – Delta or Full. Here, ‘Full’ is the same as the ‘Backup’ job. ‘Delta’ contains both keys and deltas.
The last three buttons here are:
- Restore health check – Restores selected VM backup to selected SR, boots VM with networking disabled (to prevent IP address conflicts), checks health with management agent, shut down VM, delete VM.
- Restore – Restore selected VM backup to selected SR. Can opt to start VM after restore, as well as generate new MAC addresses.
- Delete backups – Can select multiple (or all) backups in a list to be deleted from the backup remote.
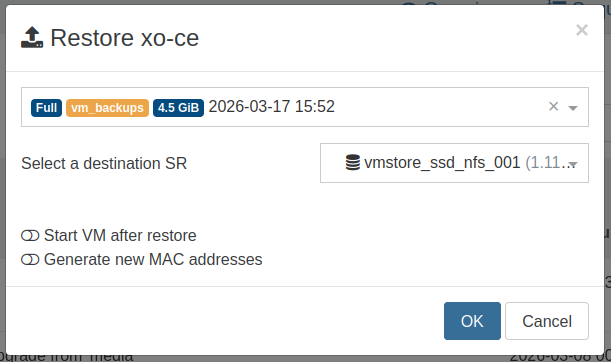
Click the blue ‘Restore’ button. Select which backup to restore, and the destination SR. I will not be starting this VM after restore. Click ‘OK’

The ‘Tasks’ page shows the restore progress.

Back on ‘Home’, the default view is filtered to only running VMs. Click the X to the right to clear the filter.
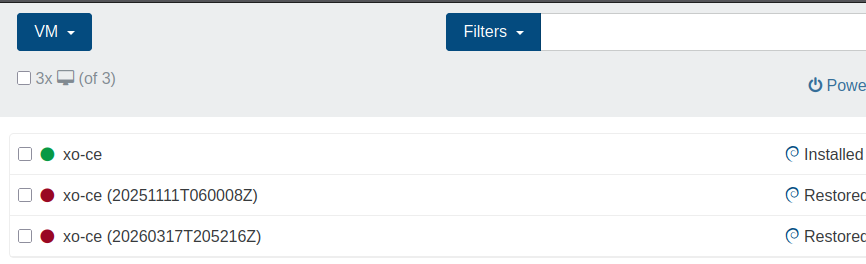
The restored VM is now visible in the list. (The middle VM is from an earlier test)
Deleting Backups
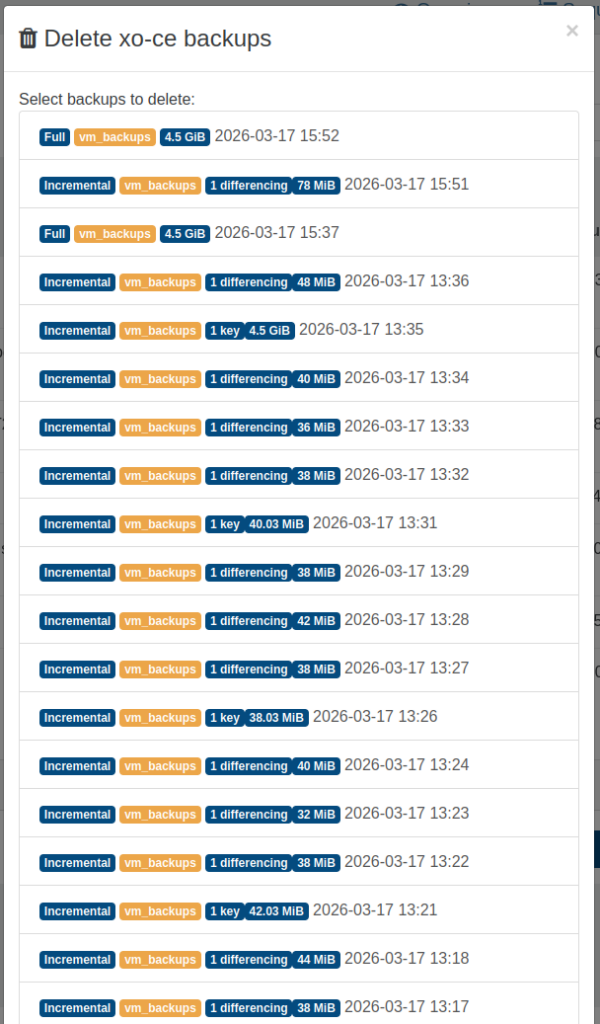
Go back to ‘Backup’, then the ‘Restore’ tab. Click the red 🗑 on the far-right end of the VM’s row. Backups are listed here as ‘Full’ or ‘Incremental’ (Delta). Each ‘Incremental’ backup shows whether is is a key or is a delta. I am going to click the ‘All’ toggle at the bottom, since these backups are no longer needed here. You will likely have just the one backup, or maybe more if you tested the job a few times. Click ‘OK’.
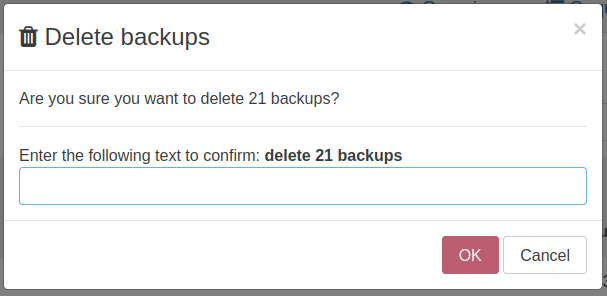
You may see a warning. Enter the text and click ‘OK’.
The red 🗑 will be replaced by a spinning progress circle. If there were a large number of backups, or the backups consumed a large amount of storage, the deletion may take several minutes. This one should be rather quick, and in my case the entire VM’s row disappeared.
It is now time to learn how to create additional VMs.