The installation process for XCP-ng 8.3 is not any more complicated than any other operating system. Of course, ensuring basic networking and storage are sorted before starting would be a huge plus, but there is some allowance to learn as you go.
Hardware Requirements:
Be sure to check the official hardware requirements.
Since this is a hypervisor OS, the initial footprint is relatively low, but at the same time it will be very beneficial to throw as many hardware resources as possible beyond that initial footprint as that is what the VMs will have to work with.
Downloading and Flashing XCP-ng 8.3 ISO
First, open your browser of choice and go to https://xcp-ng.org and click the ‘Download’ button.
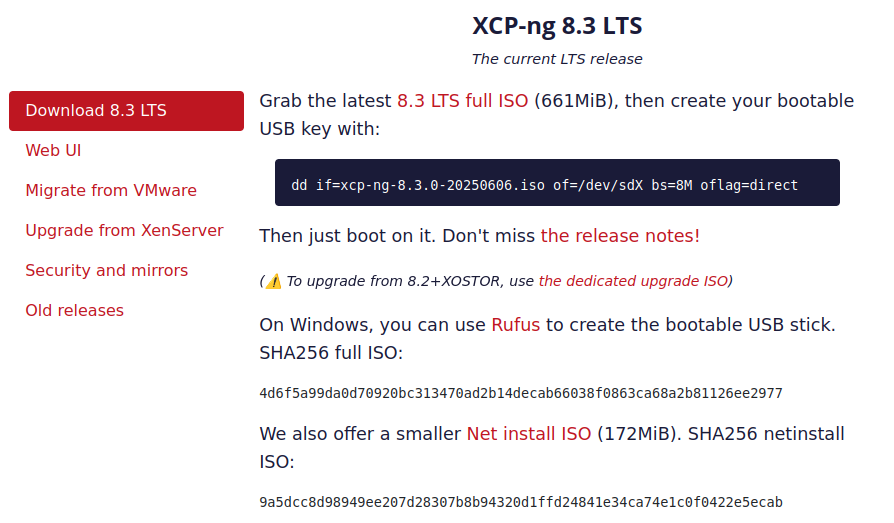
Click the link on ‘8.3 LTS full ISO’ to download the latest full ISO locally. The method to flash this to a USB flash drive will depend on your host OS. For instance, Rufus is mentioned here for Windows, and another option is Balena Etcher. On Linux, you can simply open the terminal and use the dd command shown, verifying the path and filename for the XCP-ng ISO, as well as the path for the USB device (This can be found with ‘sudo fdisk -l’).
Once written, insert the USB flash drive into, and start, the desired host. The method to select temporary boot device will depend mostly on the OEM of the host, but pressing F1, F10, Esc, or Del early during the boot process will usually present the temporary boot device screen where you can select the appropriate USB device and continue booting. If these methods do not seem to work, consult the manual or try searching Google for the model of the host device and something like ‘temporary boot device’.
Installing XCP-ng
Booting XCP-ng can take anywhere from a minute or two on commodity hardware, to several minutes on server hardware due to the often lengthy BIOS boot processes. At the GRUB screen, you can either wait to automatically proceed, or press enter to select the default. A few moments later, the installer will ask you to select your keymap:
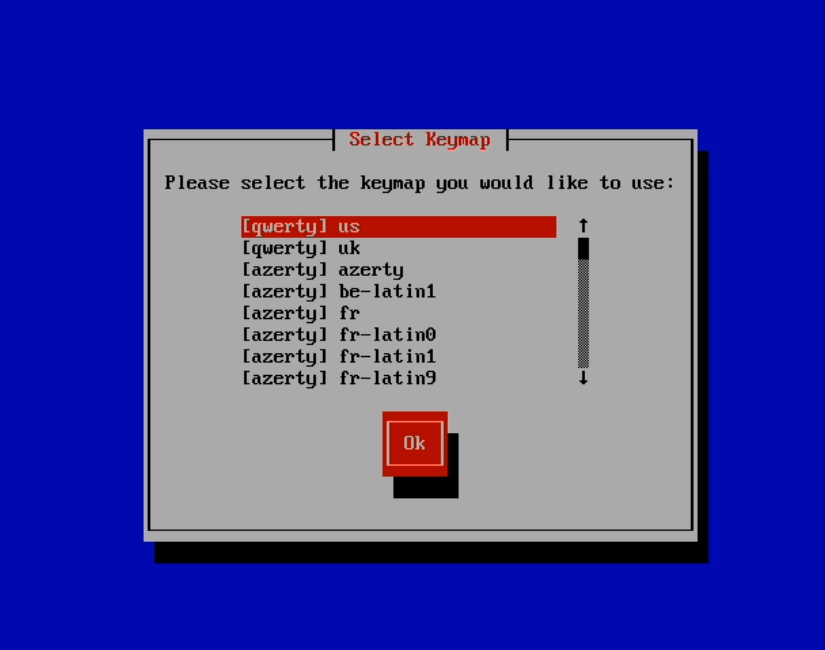
Select the appropriate keymap for your locale.
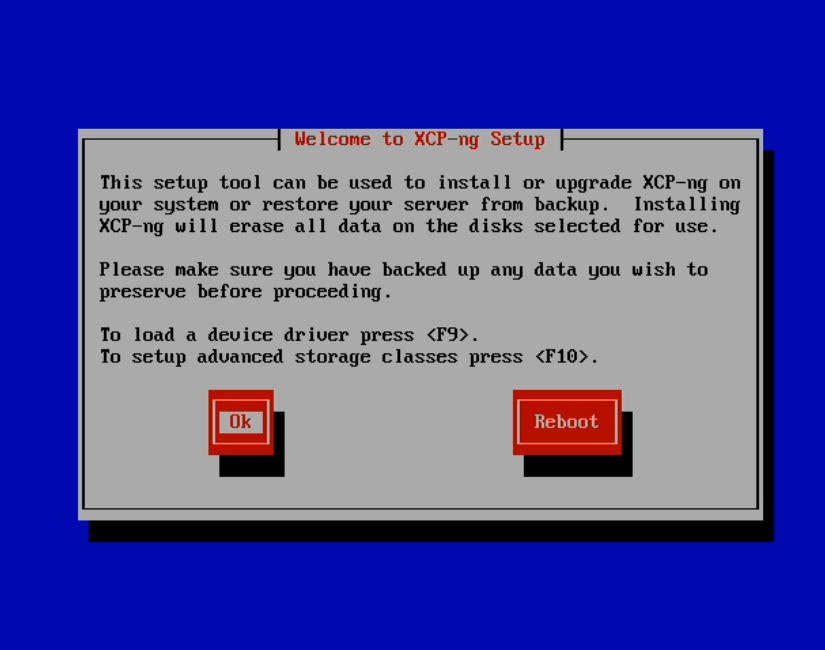
This screen is a remnant of Citrix XenServer prior to the fork from Vates and the start of XCP-ng. Device drivers and advanced storage classes should not be necessary in most cases. Select ‘Ok’ to continue.
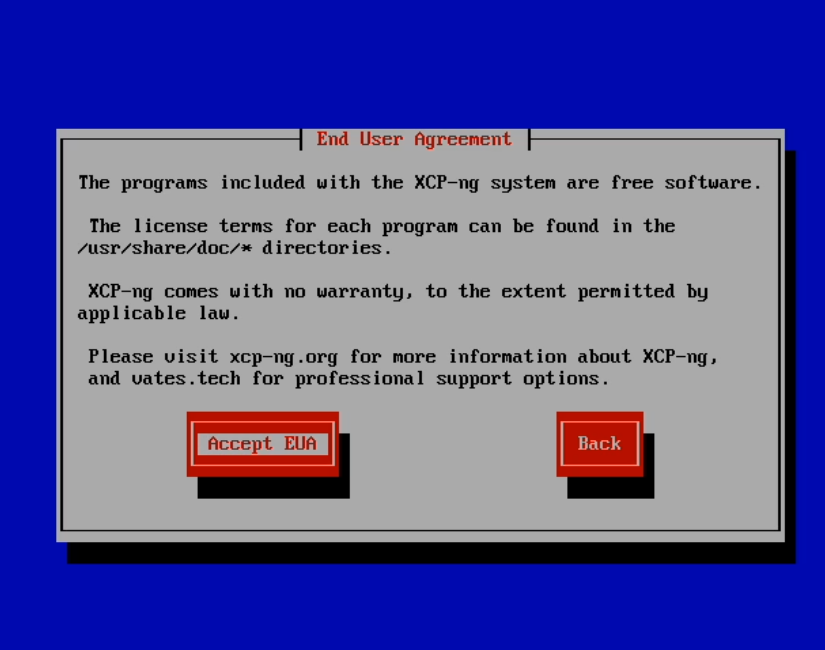
The license terms here are typical of FLOSS and can be found in the directory shown. For more information specific to XCP-ng, Vates provides their End User T&C here. If you accept, select ‘Accept EUA’.
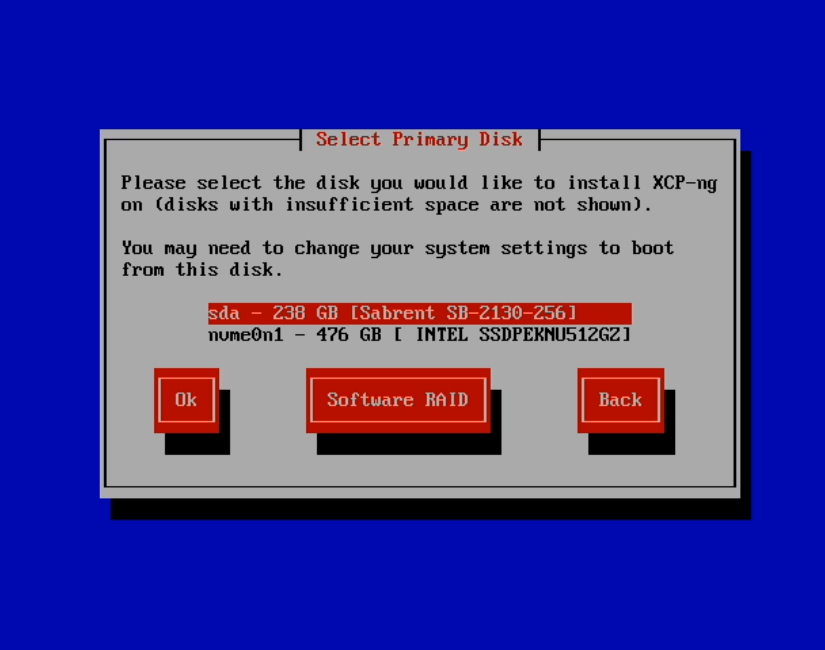
What disk you install XCP-ng on will depend on your environment. As mentioned before, these hosts do not typically have local storage and would otherwise use 10GbE links to my NAS for the VM SRs. Therefore, I have added a USB NVMe drive to function as temporary local storage to assist with bootstrapping the pool. In my case, I will be choosing the sda disk for installation. If you would like to set up Software RAID, you may do it here. However, that is outside the scope of this tutorial. Select ‘Ok’ to continue.
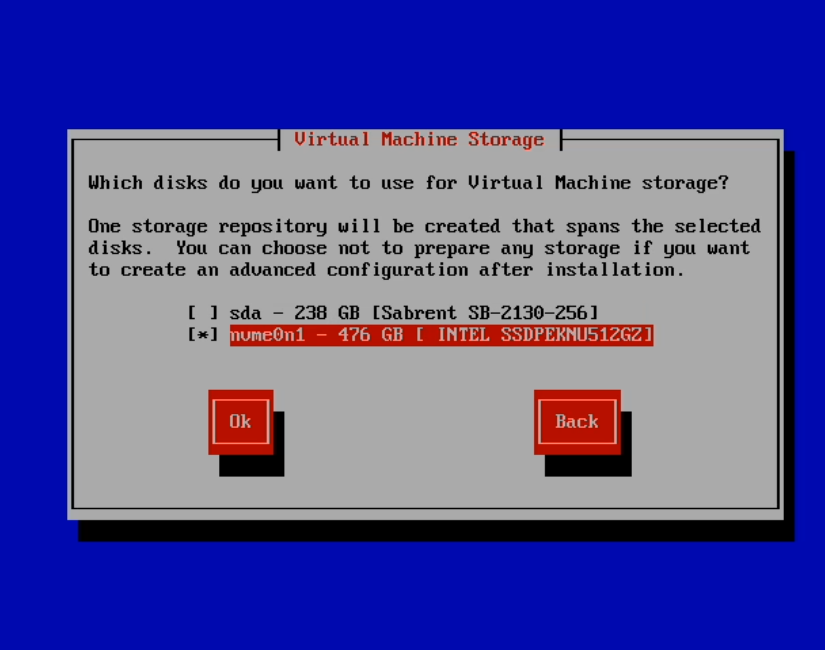
I have unselected sda as VM SR, and instead selected nvme0n1. Select whichever is appropriate for your own local VM SR, if needed. On the subsequent hosts, I will deselect all disks for local VM SR and select ‘Continue’ on the next caution screen. Select ‘Ok’ to continue.
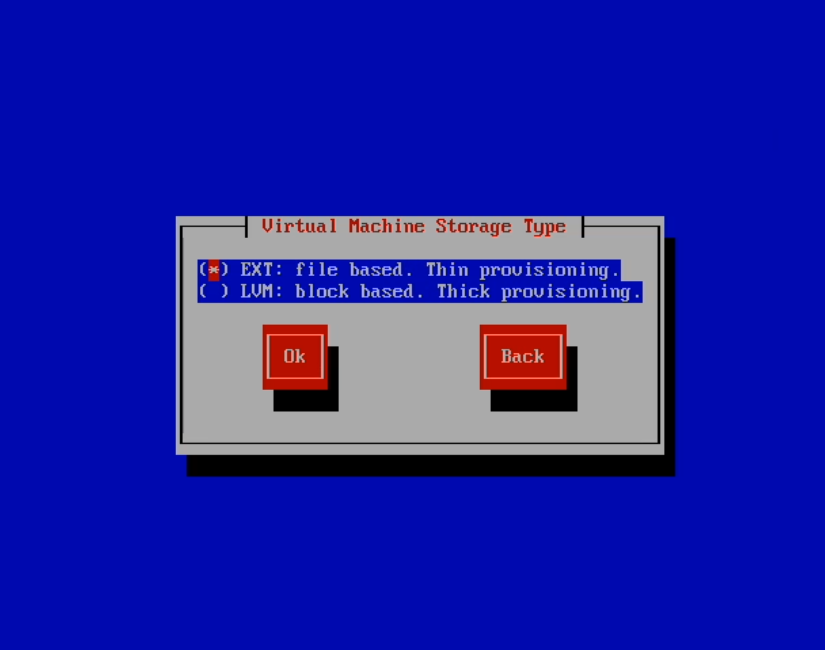
For my temporary local SR, I will be using EXT. Select ‘Ok’ to continue.
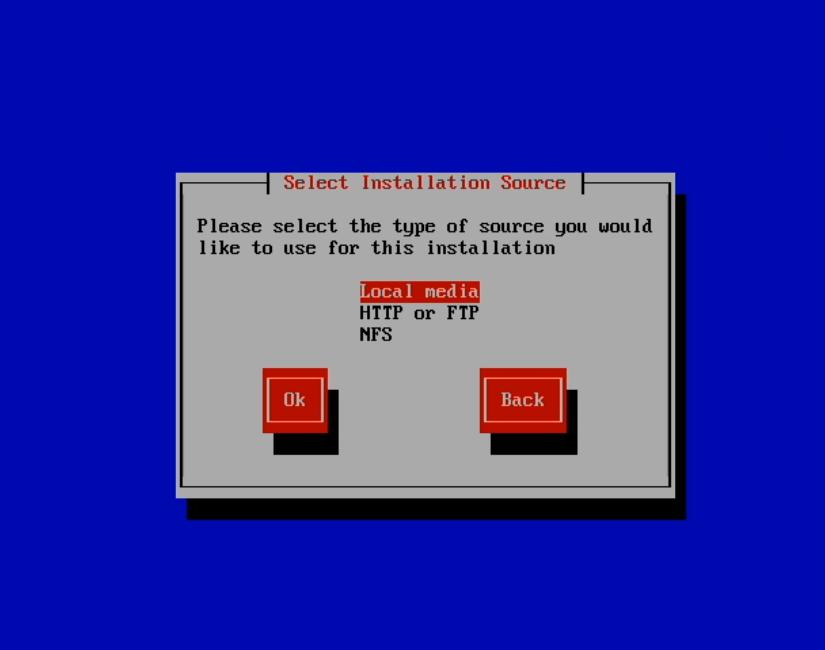
When using the full XCP-ng ISO, select ‘Local media’. Select ‘Ok’ continue.
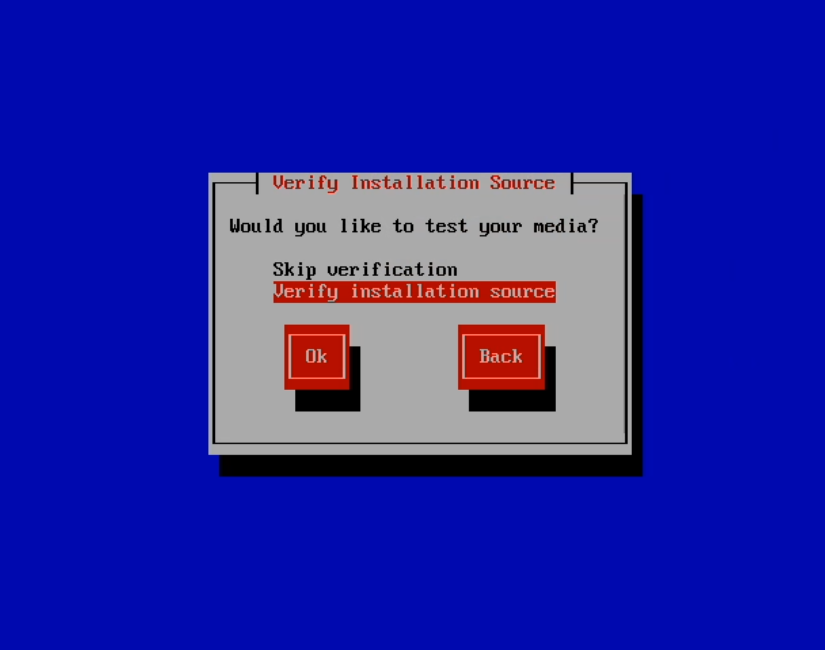
This is optional, but verification is typically quick if you like to do so. Choose either option, then select ‘Ok’ to continue.
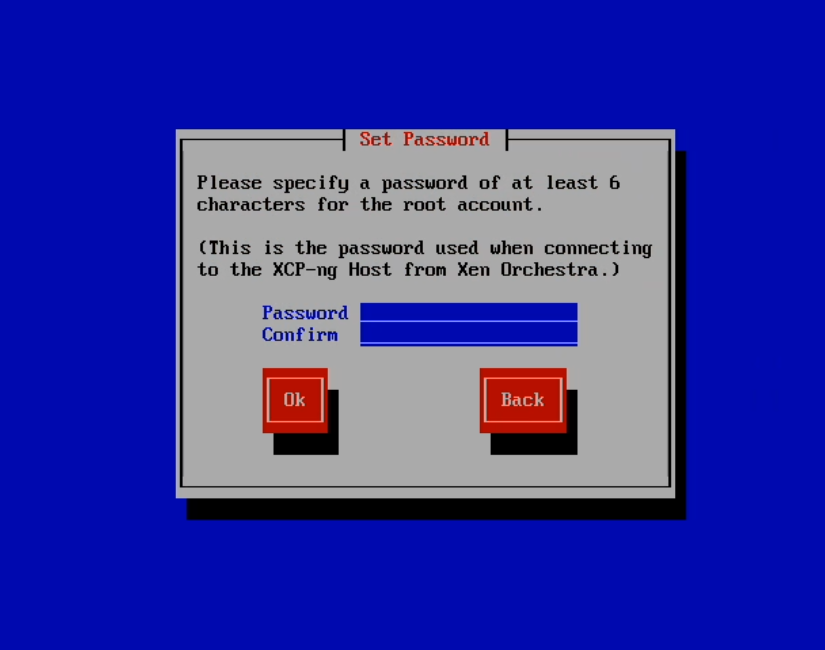
Create your root account password, then select ‘Ok’ to continue.
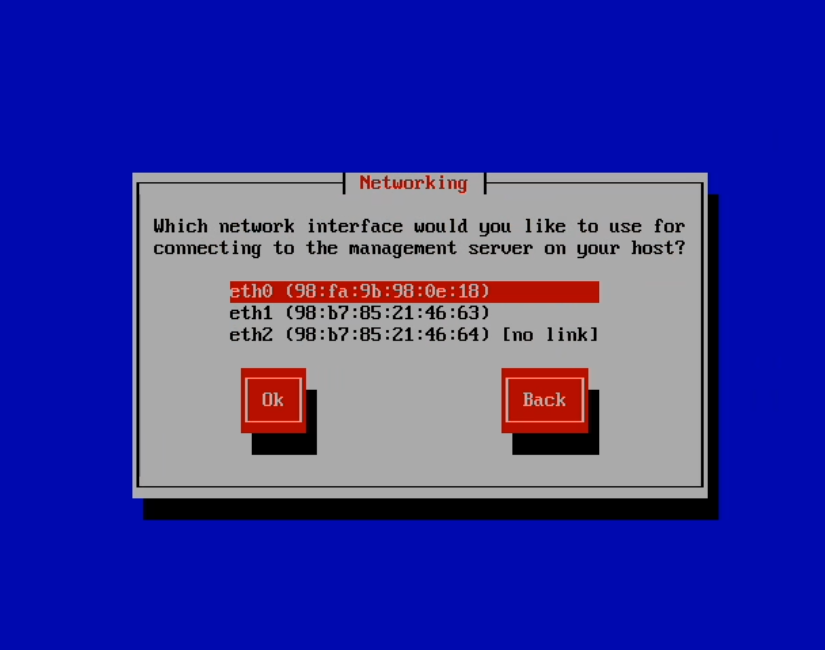
Choose the network interface to be used for management traffic. I will be using eth0 on this host for management and most data, and eth1/eth2 for storage as they are both 10GbE. If a VLAN is required, that can be configured in a later step. Select ‘Ok’ to continue.
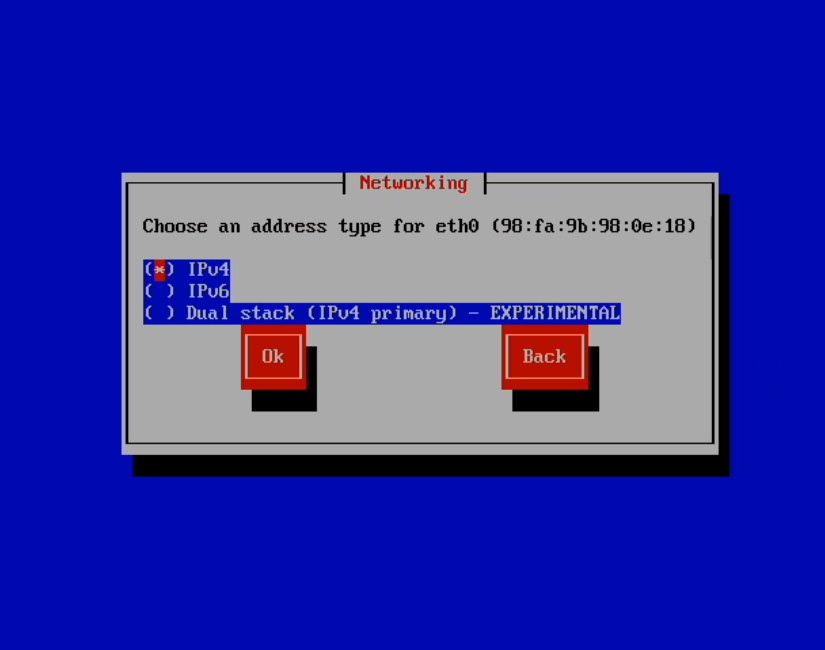
I will be using IPv4 on this host. Select ‘Ok’ to continue.
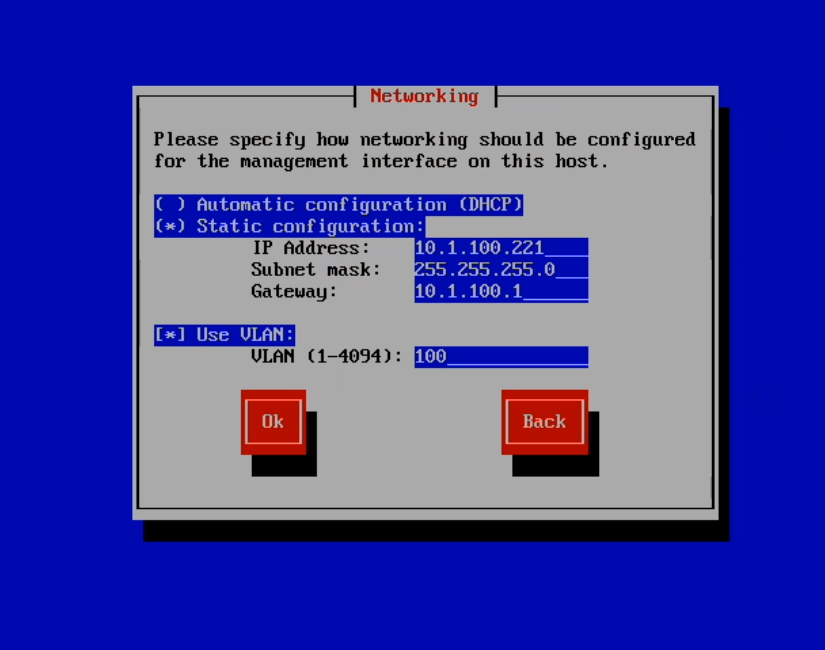
Using a static IP address for hosts is recommended to prevent potential IP address conflicts when DHCP is present on the VLAN. It is possible to assign static IP reservations on a DHCP server, but that requires additional configuration and maintenance, and is outside the scope of this tutorial. Select ‘Static configuration’, then enter the appropriate IP Address, Subnet mask, and Gateway. If your management interface will be using a VLAN, and the switch port is expecting a VLAN tag (VLAN not assigned as PVID), select ‘Use VLAN’ and enter the VLAN ID. Select ‘Ok’ to continue’
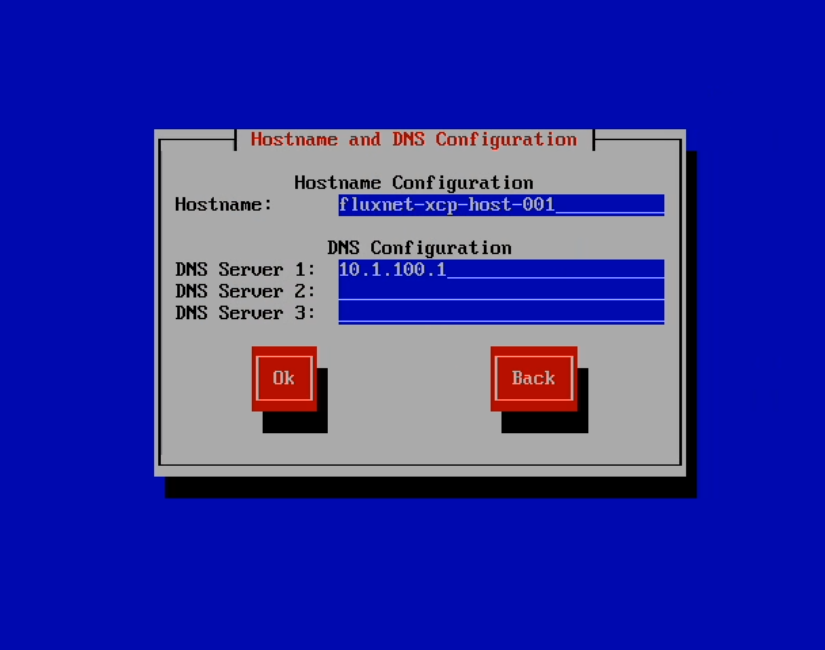
Enter the Hostname for this host. Without DHCP, manually configuring the DNS server(s) is required. Enter at least one here. Select ‘Ok’ to continue.
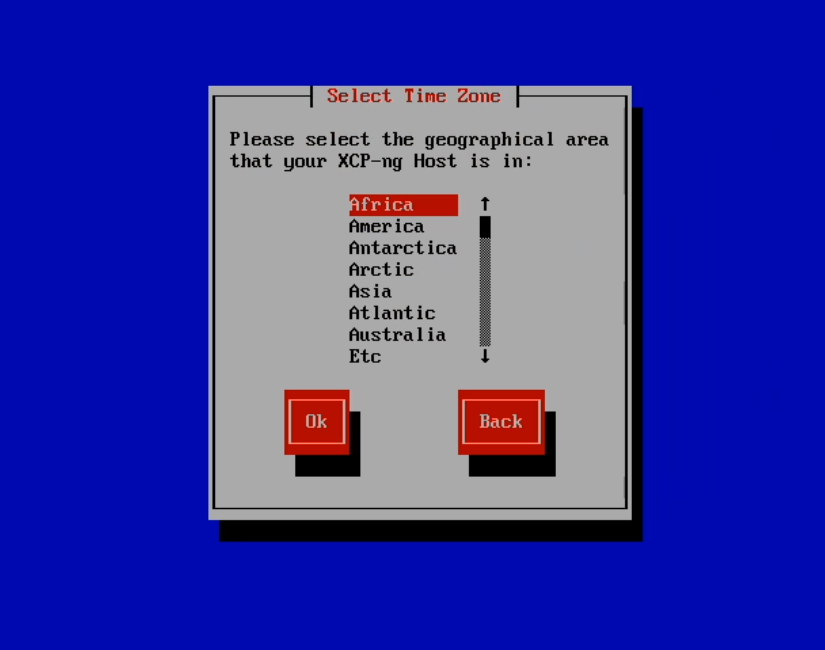
Select geographical area for time zone. Select ‘Ok’ to continue.
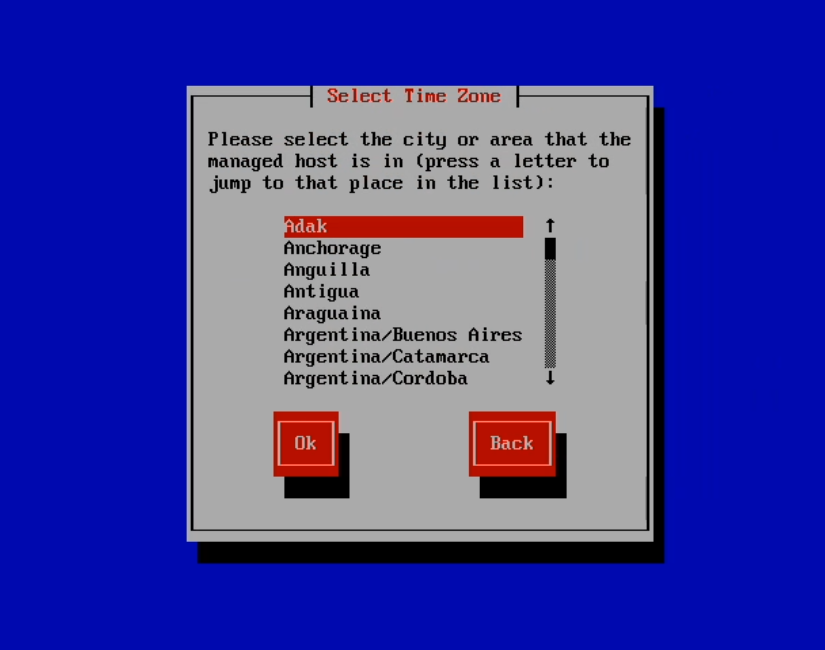
Select city or area for time zone. Select ‘Ok’ to continue.
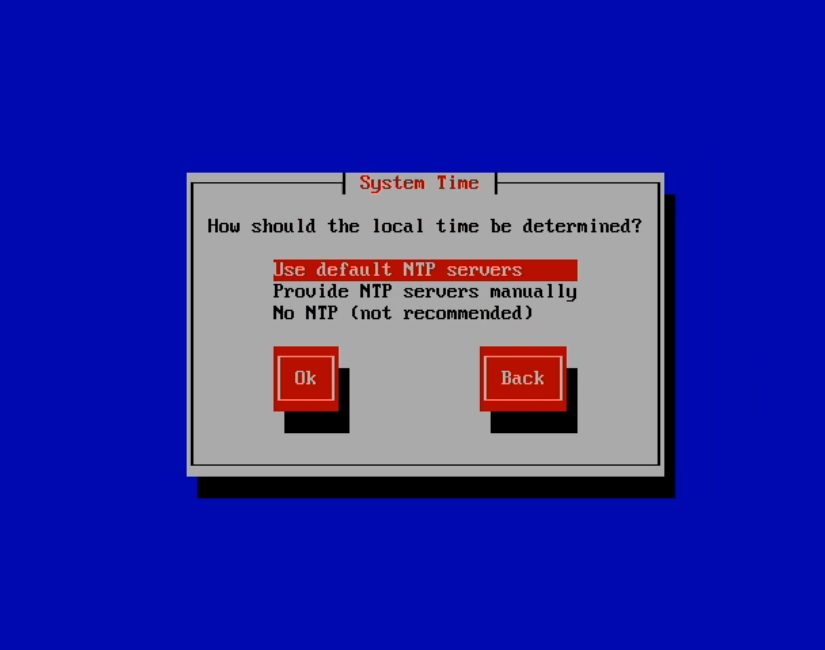
Default servers are adequate in most cases. I tend to manually specify them on critical systems to be somewhat consistent. Choose either option, then select ‘Ok’ to continue.
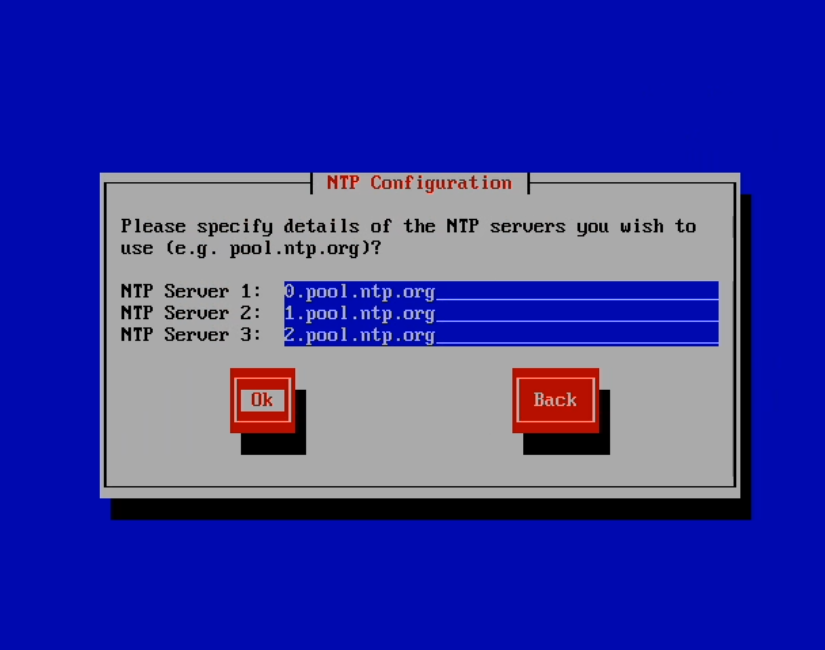
Since I am manually specifying NTP servers, I do that here. Select ‘Ok’ to continue.
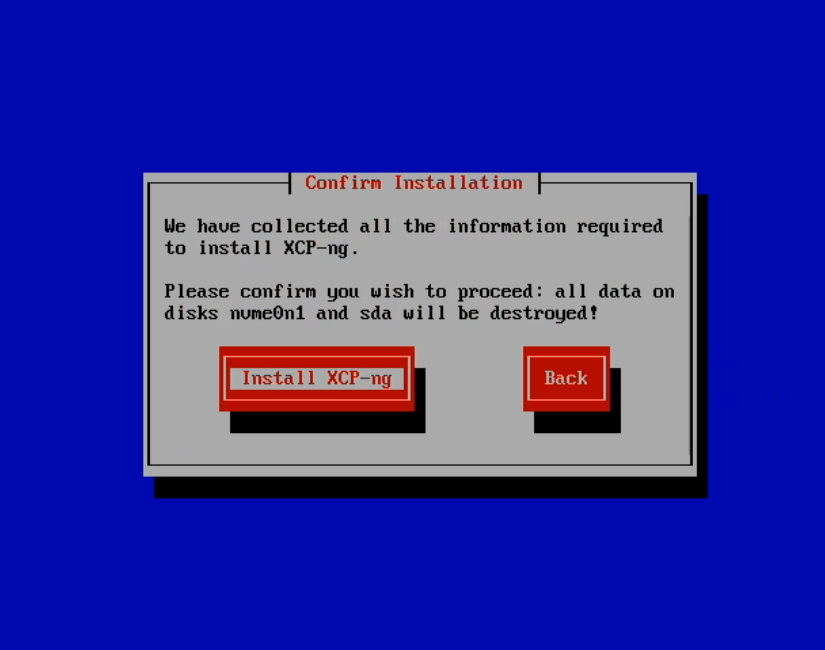
Here we are! Read the warning that all data on your specified disks will be destroyed. If this is correct, select ‘Install XCP-ng’ to continue.
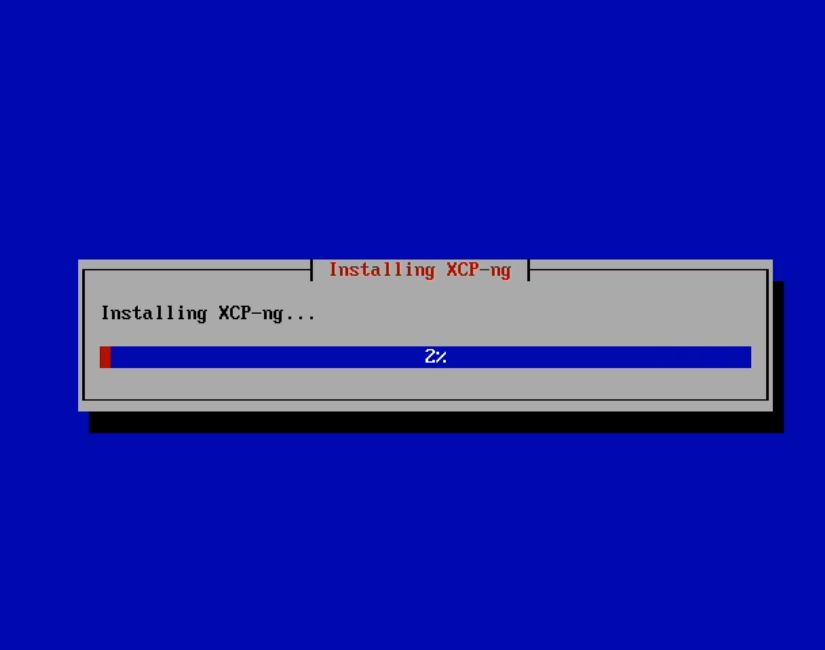
This screen and the next will be up for a few minutes, so grab a cup of coffee or go for a short walk. You’re almost done!
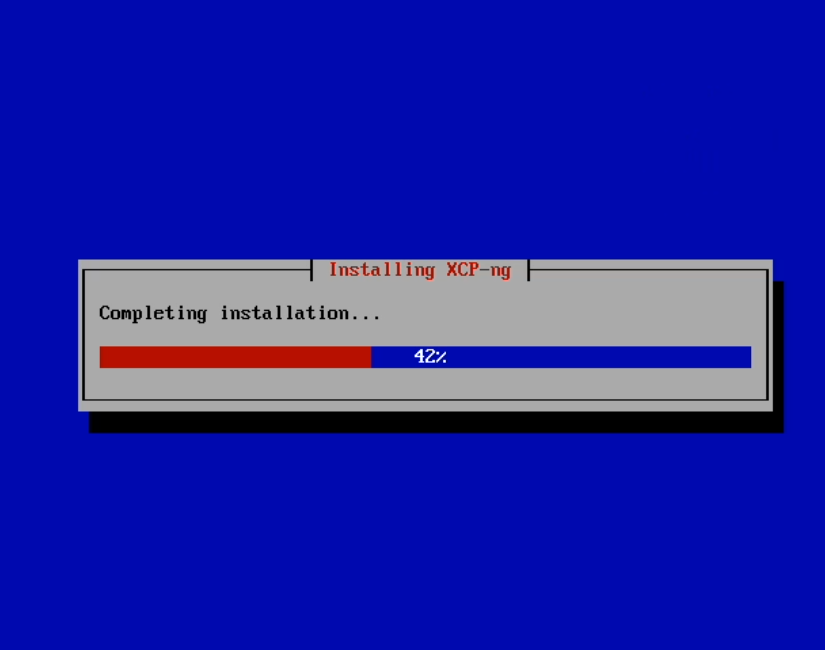
Just a few minutes more!
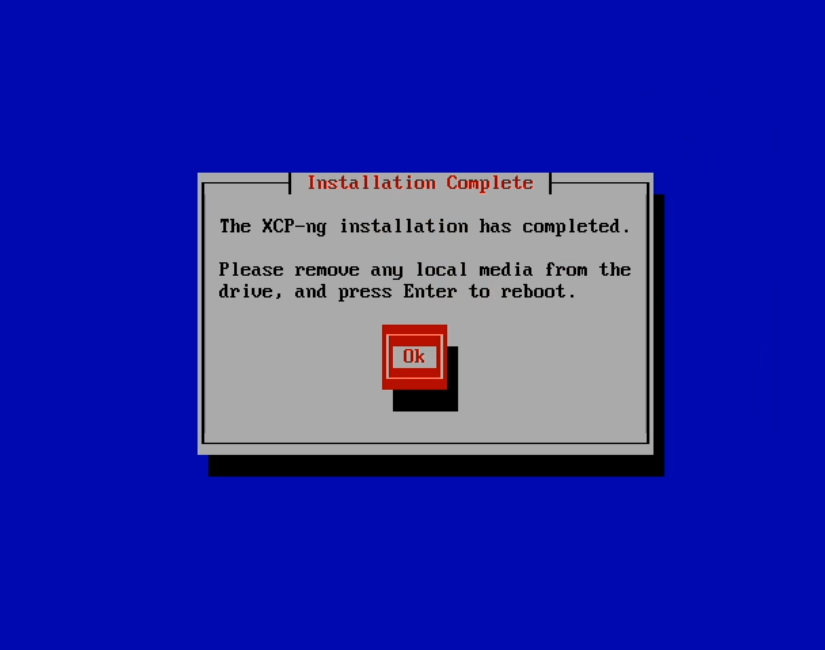
Installation has completed! Remove any installation media and select ‘Ok’ to continue.
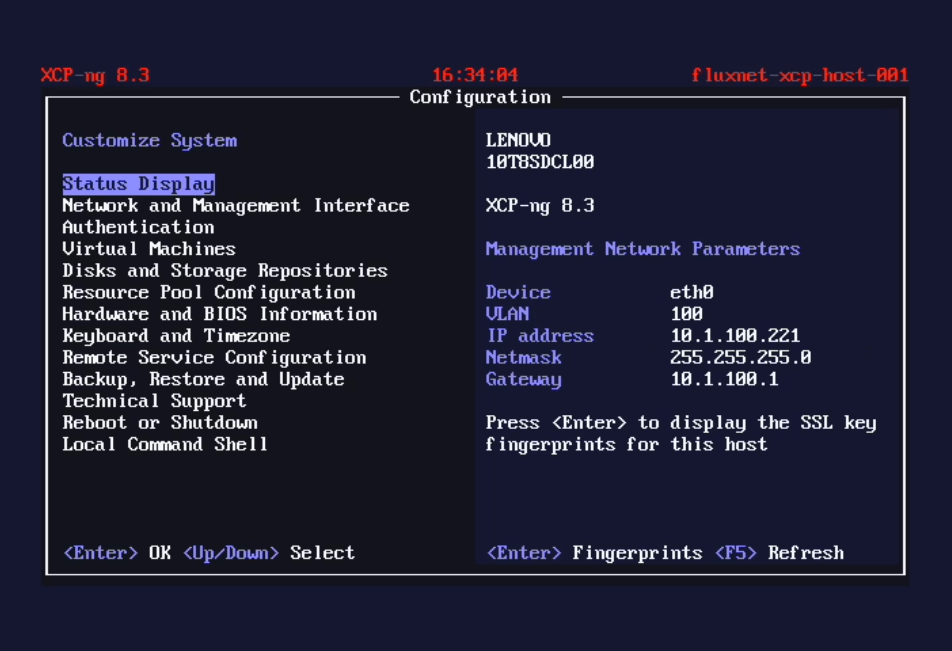
The host should then reboot. Depending on the hardware, this should be fairly short, or a bit longer (especially with server hardware). After reboot, this console screen (xsconsole) should be displayed.
At this point, I will repeat this process with my other two hosts, modifying configuration where appropriate, and choosing to not configure a local SR for them. They will sit dormant until Xen Orchestra is deployed on this host, and some basic pool configuration has been set. If you are following this with a single host with a local SR, you can skip ahead to deploying Xen Orchestra.